Introduction
If you develop web applications, APIs or distributed systems, you have already faced the need to answer two fundamental questions: “who are you?” (authentication) and “what can you do?” (authorization). These two concepts are the pillars of any secure system, but they often cause confusion — especially when protocols such as OAuth2, OpenID Connect and tokens such as JWT come into play.
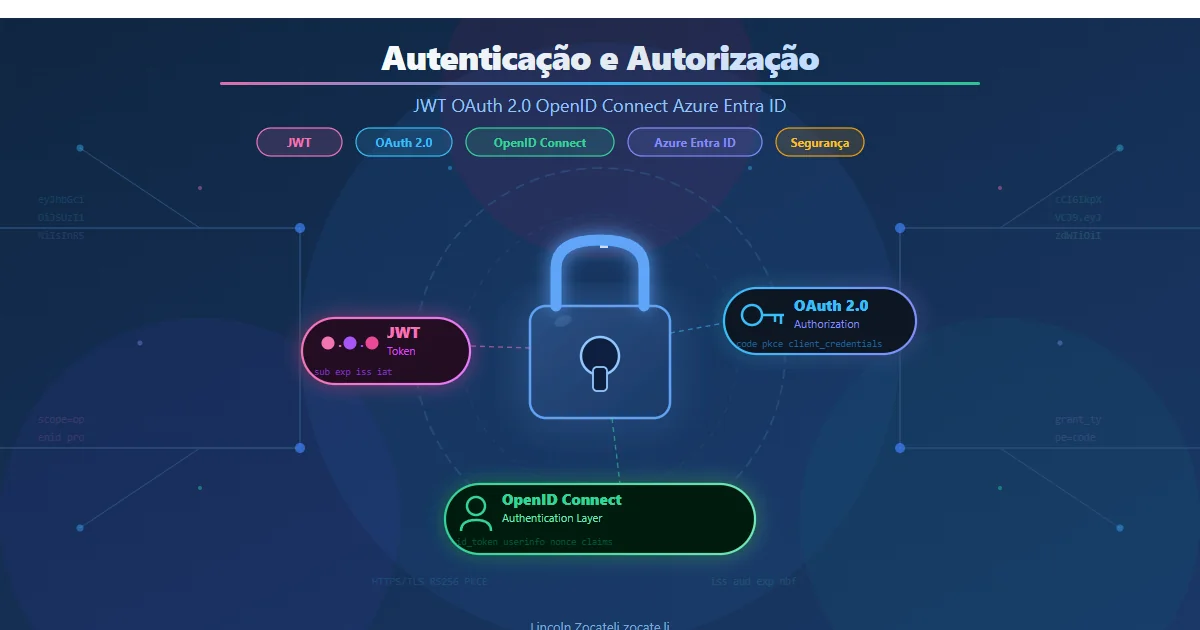
In this article, I will demystify these concepts in a practical and didactic way. You will understand the difference between authentication and authorization, how JWT (JSON Web Token) works under the hood, the role of OAuth 2.0 in access delegation, and how OpenID Connect adds the missing identity layer. In addition, I will explore the Client ID types that exist in Azure Entra ID (formerly Azure AD) and when to use each one for SPA, Server-Side and REST API applications.
This content is aimed at back-end, front-end and full-stack developers who want to implement authentication and authorization correctly and securely. If you work with automation and system integration, this article will also be useful — just as understanding the differences between terminal and pipeline matters for execution contexts, the security of your flows depends on understanding how identities are managed. And if you already master these fundamentals and want to take your SPA’s security to the next level, check out BFF Backend For Frontend: Security in SPAs, where I apply these concepts in the BFF pattern. If you are looking for an open-source and free solution to implement all of this on your own infrastructure, see Keycloak: Free Authentication with Containers and C#.
📦 Source code: The full implementation of this article is in the blog-zocateli-sample repository on GitHub. See the examples in C# / Entra ID, Angular / MSAL and Python / Flask.
Authentication vs. Authorization: What Is the Difference?
Before diving into the protocols, it is essential to understand the difference between these two concepts which, although related, have completely different responsibilities.
Authentication (AuthN) is the process of verifying the identity of a user or system. It is the answer to the question: “Are you who you say you are?”. When you type your email and password on a login screen, you are going through an authentication process. Other examples include biometrics, digital certificates and access tokens.
Authorization (AuthZ) is the process of verifying permissions. After confirming who you are, the system needs to decide: “What are you allowed to do?”. An authenticated user may have access to certain resources, but not all of them. For example, a developer may be allowed to read production logs, but not to delete databases.
| Aspect | Authentication (AuthN) | Authorization (AuthZ) |
|---|---|---|
| Question | “Who are you?” | “What can you do?” |
| When | Happens first | Happens after authentication |
| Mechanism | Login, passwords, tokens, biometrics | Roles, claims, policies, scopes |
| Protocol | OpenID Connect, SAML | OAuth 2.0 |
| Example | Logging in with email and password | Accessing the API’s /admin endpoint |
ℹ️ Info: A very common mistake is treating OAuth 2.0 as an authentication protocol. In fact, OAuth 2.0 is an authorization protocol. The authentication layer is added by OpenID Connect, which is built on top of OAuth 2.0.
What Is JWT (JSON Web Token)?
JWT (pronounced “jot”) is an open standard defined in RFC 7519 for transmitting information compactly and securely between parties as a JSON object. It is widely used as the token format in authentication and authorization flows.
Structure of a JWT
A JWT is made up of three parts separated by dots (.):
| |
- Header — contains the token type and the signing algorithm.
- Payload — contains the claims (statements) about the entity and metadata.
- Signature — guarantees that the token has not been tampered with.
Decoded JWT Example
Header:
| |
Payload:
| |
Important Claims in the Azure Entra ID Context
| Claim | Description |
|---|---|
iss | Token issuer — identifies Azure Entra ID |
sub | Subject — unique user identifier |
aud | Audience — the application/API the token was issued for |
exp | Token expiration (Unix timestamp) |
iat | Moment of issuance (issued at) |
roles | Roles assigned to the user in the application |
scp | Delegated scopes — granted permissions |
tid | Azure Entra Tenant ID |
oid | User Object ID in the directory |
⚠️ Warning: Never store sensitive information in a JWT payload. The payload is Base64-encoded, but not encrypted — anyone can decode it. The signature only guarantees integrity, not confidentiality. If you need confidentiality, use JWE (JSON Web Encryption) as described in RFC 7516.
Validating a JWT
When receiving a JWT, your application MUST validate:
- Signature — verify it with the issuer’s public key (available at the JWKS endpoint).
- Issuer (
iss) — confirm the issuer is the expected one. - Audience (
aud) — confirm the token was issued for your API. - Expiration (
exp) — reject expired tokens. - Not Before (
nbf) — if present, reject tokens before the allowed time.
OAuth 2.0: The Authorization Protocol
OAuth 2.0 is an authorization framework defined in RFC 6749 that allows applications to obtain limited access to a user’s resources on a server without exposing the user’s credentials to the application.
The Four OAuth 2.0 Roles
The protocol defines four fundamental roles:
- Resource Owner — the user who owns the data (e.g., the account owner).
- Client — the application that wants to access the data on behalf of the user.
- Authorization Server — the server that authenticates the user and issues tokens (e.g., Azure Entra ID).
- Resource Server — the API that protects the resources and validates the tokens.
Main Flows (Grant Types)
OAuth 2.0 defines several flows for different scenarios. Each type of application uses the flow best suited to its architecture:
| Flow | Scenario | Security |
|---|---|---|
| Authorization Code + PKCE | SPAs, mobile apps, web apps | High |
| Client Credentials | Server-to-server communication (M2M) | High |
| On-Behalf-Of (OBO) | APIs calling other APIs on behalf of the user | High |
| Device Code | Devices without a browser (IoT, CLI) | Medium |
⚠️ Warning: The Implicit and Resource Owner Password Credentials (ROPC) flows are considered obsolete and insecure. The IETF recommendation and Microsoft’s guidance is to use Authorization Code with PKCE for all public applications (SPAs and mobile).
The Authorization Code Flow with PKCE
This is the recommended flow for most modern applications. Here is the step by step:
- The Client generates a
code_verifier(random string) and acode_challenge(SHA-256 hash of the verifier). - The Client redirects the user to the Authorization Server with the
code_challenge. - The user authenticates and consents to the access.
- The Authorization Server returns an authorization code to the Client.
- The Client exchanges the authorization code +
code_verifierfor an access token. - The Client uses the access token to access the Resource Server (API).
| |
OpenID Connect: Identity on Top of OAuth 2.0
OpenID Connect (OIDC) is an identity layer built on top of OAuth 2.0. While OAuth 2.0 answers “what can you access?”, OIDC answers “who are you?”.
OIDC introduces a new type of token: the ID Token. This token is a JWT that contains information about the authenticated user (name, email, picture, etc.) and is issued together with the access token.
Difference Between the Tokens
| Token | Purpose | Format | Who consumes it? |
|---|---|---|---|
| ID Token | User identity information | JWT | The Client (front-end) |
| Access Token | Authorization to access protected resources | JWT* | The Resource Server |
| Refresh Token | Obtain new access tokens without re-authenticating | Opaque | The Authorization Server |
ℹ️ Info: The Access Token issued by Azure Entra ID is a JWT, but the OAuth 2.0 specification does not mandate that format — some providers use opaque tokens. Always validate the token according to your provider’s documentation.
OpenID Connect Scopes
OIDC defines standardized scopes that determine which user information is returned:
openid— required to enable the OIDC flow; returns thesubclaim.profile— returnsname,family_name,given_name,picture, etc.email— returnsemailandemail_verified.offline_access— requests a refresh token for access renewal.
SAML 2.0: The Corporate Identity Protocol
Before moving on to the Client ID types in Azure Entra, it is worth knowing another protocol widely used in corporate environments: SAML 2.0 (Security Assertion Markup Language). While OpenID Connect dominates the landscape of modern applications (SPAs, REST APIs, mobile), SAML remains the standard in many organizations — especially for integration with legacy systems, ERPs and federation between companies.
What Is SAML 2.0?
SAML 2.0 is an open XML-based standard, defined by OASIS, for exchanging authentication and authorization data between an Identity Provider (IdP) and a Service Provider (SP). It was published in 2005 and became the dominant protocol for corporate Single Sign-On (SSO) over the last decade.
How Does the SAML Flow Work?
The most common flow is SP-Initiated SSO (login starts at the service the user wants to access):
| |
- The user accesses the Service Provider (your application)
- The SP detects that the user is not authenticated and generates a SAML AuthnRequest (XML)
- The browser is redirected to the Identity Provider with the AuthnRequest
- The user authenticates at the IdP (login, MFA, etc.)
- The IdP generates a SAML Response containing an Assertion (signed statement with the user’s data)
- The browser POSTs the SAML Response to the SP, which validates the signature and establishes the session
SAML Assertion: The Structure
A SAML Assertion is a digitally signed XML document that contains:
| |
ℹ️ Info: Unlike JWT (which is compact and JSON-based), the SAML Assertion is XML-based — more verbose, but with a consolidated and widely audited digital signature model (XML Signature).
SAML 2.0 vs OpenID Connect: When to Use Each?
| Aspect | SAML 2.0 | OpenID Connect |
|---|---|---|
| Format | XML | JSON (JWT) |
| Transport | HTTP Redirect / POST | HTTP Redirect / REST |
| Token size | Large (verbose XML) | Compact (JWT) |
| Ideal scenarios | Corporate SSO, B2B federation, legacy | SPAs, REST APIs, mobile, microservices |
| Mobile support | Weak (heavy XML) | Native (JSON + PKCE) |
| Maturity | Since 2005, very widespread in enterprise | Since 2014, standard for modern apps |
| Identity Providers | ADFS, Shibboleth, PingFederate, Keycloak | Azure Entra, Google, Keycloak, Auth0 |
| Base protocol | Independent | Built on OAuth 2.0 |
💡 Tip: In practice, many modern identity providers support both protocols. Keycloak, for example, is an open-source IdP that implements OAuth 2.0, OpenID Connect and SAML 2.0 — allowing you to serve both modern applications and legacy systems with a single identity server.
Practical recommendation:
- For new applications (SPAs, APIs, mobile): use OpenID Connect
- For integration with legacy corporate systems (SAP, Salesforce, ADFS): use SAML 2.0
- For mixed environments: use an IdP that supports both (Azure Entra ID, Keycloak) and configure each application with the most suitable protocol
Client ID Types in Azure Entra ID
In Azure Entra ID, when you register an application, you get a Client ID (also called Application ID). However, the registration type and the platform configuration vary according to the nature of the application. This directly affects the OAuth flow used and the security level.
Public vs. Confidential Application
Azure Entra ID classifies applications into two fundamental types:
| Type | Can keep a secret? | Examples | Recommended flows |
|---|---|---|---|
| Public | No | SPA, mobile, desktop, CLI | Authorization Code + PKCE |
| Confidential | Yes | Server-side web app, daemon, API | Auth Code + Secret, Client Credentials |
💡 Tip: An application is public when it runs in an environment the user controls (browser, phone, desktop) — where a secret cannot be stored securely. An application is confidential when it runs on a server you control.
1. Client ID for SPA Applications (Single Page Application)
A SPA (Single Page Application) is a front-end application that runs entirely in the browser, such as React, Angular or Vue.js applications. Because the code runs on the client side, it is not possible to store Client Secrets — any secret would be exposed in the source code or in the browser’s developer tools.
Configuration in Azure Entra ID:
- Platform type: Single-page application
- Application type: Public client
- Redirect URI:
http://localhost:4200(dev) /https://app.seudominio.com(production) - OAuth flow: Authorization Code with PKCE
- Client Secret: DO NOT use — public applications must not have a secret
Registration via Azure CLI:
| |
Example with Angular 16+ and @azure/msal-angular:
First, install the required dependencies:
| |
MSAL configuration (auth-config.ts):
| |
Main module with the standalone API (app.config.ts):
| |
Protected routes (app.routes.ts):
| |
Component with login and API call (home.component.ts):
| |
💡 Tip: In Angular 16+,
MsalInterceptorautomatically injects the access token into all HTTP requests that match the patterns configured inprotectedResourceMap. You do not need to manage tokens manually — just useHttpClientnormally.
ℹ️ Info: Although MSAL works well for SPAs, the most secure approach today is the BFF (Backend For Frontend) pattern, which avoids exposing tokens in the browser. See the full implementation in BFF Backend For Frontend: Security in SPAs.
2. Client ID for Server-Side Applications (Web App)
Server-side applications are traditional web applications that run on the server (e.g., ASP.NET, Django, Express.js). Because the code runs in a controlled environment, these applications can store a Client Secret securely.
Configuration in Azure Entra ID:
- Platform type: Web
- Application type: Confidential client
- Redirect URI:
https://app.seudominio.com/auth/callback - OAuth flow: Authorization Code (with Client Secret)
- Client Secret: Yes — stored securely on the server (e.g., environment variable, Key Vault)
Registration via Azure CLI:
| |
Example with Python (Flask + MSAL):
| |
⚠️ Warning: Never expose the Client Secret in source code, Git repositories or logs. Use environment variables, Azure Key Vault or secret management tools. In the example above, the values come from
os.environfor security.
3. Client ID for REST APIs (Machine-to-Machine Communication)
When a backend API or daemon service needs to access another protected API without user interaction, the Client Credentials flow is used. In this scenario, the application itself authenticates with its Client ID and Client Secret (or certificate), without involving any user.
Configuration in Azure Entra ID:
- Platform type: None (no Redirect URI needed)
- Application type: Confidential client
- OAuth flow: Client Credentials
- Client Secret or Certificate: Yes — required
- Permissions: Application permissions (not delegated)
Common scenarios:
- Cron jobs and scheduled services that consume APIs
- Microservice A calling Microservice B
- CI/CD pipelines that access protected resources
- Background daemons and workers
Example with Python (requests + MSAL):
| |
💡 Tip: For high-security production scenarios, prefer certificates over Client Secrets for authenticating M2M services. Certificates offer greater security and can be managed via Azure Key Vault.
Comparison Table: Which Client ID Type Should You Use?
This table summarizes the decisions you need to make when registering your application in Azure Entra ID:
| Characteristic | SPA (Public Client) | Server-Side (Confidential) | REST API / Daemon (Confidential) |
|---|---|---|---|
| Where it runs | User’s browser | Web server | Backend server |
| Client Secret | No | Yes | Yes (or certificate) |
| OAuth flow | Auth Code + PKCE | Auth Code + Secret | Client Credentials |
| User interaction | Yes (interactive login) | Yes (interactive login) | No (M2M) |
| Tokens received | ID Token + Access Token | ID Token + Access Token | Access Token only |
| Refresh Token | Yes (with offline_access) | Yes | No (uses token cache) |
| App example | Angular, React, Vue | Flask, ASP.NET, Express | Cron job, microservice, daemon |
| Platform in the portal | Single-page application | Web | None (app permissions only) |
| MSAL library | @azure/msal-angular | msal-python / MSAL.NET | msal-python / MSAL.NET |
Protecting Your API with C#: Token Validation in ASP.NET Core
Regardless of which type of client calls your API, the REST API needs to validate the access token it receives. Here is how to do it in C# with ASP.NET Core using the Microsoft.Identity.Web package, which is Microsoft’s recommended way to protect APIs with Azure Entra ID.
First, create the project and install the dependencies:
| |
Configuration (appsettings.json):
| |
Program.cs configuration:
| |
Controller with protected endpoints (DadosController.cs):
| |
💡 Tip: The
Microsoft.Identity.Webpackage greatly simplifies token validation in ASP.NET Core. It automatically fetches the JWKS keys from Azure Entra ID and validates issuer, audience, signature and expiration — all configured with a single line inProgram.cs. In addition, extension methods such asUser.GetDisplayName()andUser.GetObjectId()make it easy to extract claims from the already validated JWT.
Tips and Good Practices
Always use PKCE for public applications: even if the framework does not require it, PKCE protects against authorization code interception attacks. Azure Entra ID supports PKCE for all flows.
Prefer certificates over Client Secrets in production: Client Secrets expire and can leak into logs. Certificates managed by Azure Key Vault are more secure and support automated rotation.
Define granular scopes in your API: instead of a single generic scope, create scopes such as
User.Read,User.Write,Admin.Fullto apply the principle of least privilege.Validate ALL JWT fields in your API: do not rely on the signature alone. Validate
iss,aud,exp,nbfand the scopes/roles required for each endpoint.Use Managed Identities when possible: for services running on Azure (App Service, Functions, VMs), use Managed Identities instead of Client Secrets. This removes the need to manage credentials.
Configure appropriate expiration times: Access Tokens should be short-lived (default: 1 hour in Azure Entra). Use Refresh Tokens for renewal. Never extend the expiration time excessively.
Implement logout correctly: besides clearing tokens locally, redirect the user to the Azure Entra logout endpoint (
/oauth2/v2.0/logout) to end the session at the identity provider.
⚠️ Warning: Never validate tokens only on the front end. The real validation must happen in the API (Resource Server). The front end may inspect the ID Token to display user information, but authorization always happens on the backend.
Conclusion
Understanding the difference between authentication and authorization is the foundation for building secure systems. JWT offers a compact, self-contained format for carrying identity and permission claims. OAuth 2.0 solves the problem of access delegation without exposing credentials, while OpenID Connect adds the identity layer that lets you know who the authenticated user is.
In practice, when using Azure Entra ID, choosing the correct Client ID type is decisive for your application’s security: SPA applications use public clients with PKCE, server-side applications use confidential clients with secrets, and APIs/daemons use the Client Credentials flow for machine-to-machine communication. And if the scenario requires integration with legacy systems, SAML 2.0 remains the appropriate protocol — many identity providers, including Azure Entra ID, support both protocols simultaneously.
The most important thing is to follow the principle that each application should have only the permissions required to perform its function. For SPAs that handle sensitive data, consider adopting the BFF (Backend For Frontend) pattern, which moves the tokens to the server — see how to implement it in BFF Backend For Frontend: Security in SPAs. If you need a free and open-source identity provider that supports OAuth 2.0, OpenID Connect and SAML 2.0 on your own infrastructure, check out Keycloak: Free Authentication with Containers and C#. If you enjoyed this content, leave a comment with your questions or share it with other developers. To deepen your knowledge of project automation, also check out Makefile: Automating tasks for Python, Hugo and Docker.
Read Also
- Keycloak: Free Authentication with Containers and C# — open-source identity provider supporting OAuth 2.0, OIDC and SAML 2.0
- .NET 8+ Configuration Pipeline: IOptions, Secrets and Docker — understand how .NET 8+ loads JWT settings, keys and secrets through the configuration pipeline and IOptions.
- BFF Backend For Frontend: Security in SPAs
- Terminal vs Pipeline: differences when running scripts
- Makefile: Automating tasks for Python, Hugo and Docker
- The Pragmatic Programmer: practical lessons from the book
References
- Microsoft Identity Platform — Overview — official documentation for Azure Entra ID (formerly Azure AD) and its authentication flows.
- RFC 7519 — JSON Web Token (JWT) — official IETF JWT specification.
- RFC 6749 — OAuth 2.0 Authorization Framework — official OAuth 2.0 specification.
- RFC 7636 — Proof Key for Code Exchange (PKCE) — OAuth 2.0 security extension used by public clients.
- OpenID Connect Core 1.0 — official OpenID Connect specification.
- @azure/msal-angular — MSAL Angular — Microsoft’s official library for authentication in Angular SPAs.
- MSAL Python — Microsoft Authentication Library for Python — Microsoft’s official library for authentication in Python applications.
- Microsoft.Identity.Web — Protecting ASP.NET Core APIs — official documentation for protecting APIs with Azure Entra ID in ASP.NET Core.
- Microsoft.Identity.Web — GitHub repository — source code and official samples for the NuGet package.
- OAuth 2.0 Security Best Current Practice (IETF) — up-to-date security recommendations for OAuth 2.0 implementations.
- SAML 2.0 Core Specification (OASIS) — official SAML 2.0 specification by OASIS.
- Azure Key Vault — Overview — Azure’s service for managing secrets, keys and certificates.
- Keycloak — Official site — open-source identity provider supporting OAuth 2.0, OIDC and SAML 2.0.
- blog-zocateli-sample repository — Entra ID — C# source code for the examples in this article
- blog-zocateli-sample repository — Auth SPA (Angular) — Angular front end with MSAL
- blog-zocateli-sample repository — Python OAuth — Flask examples with Authorization Code Flow and Client Credentials
By commenting, you agree to our Privacy Policy, Terms of Use, Data Deletion Policy.